How to get all those photos
on your |
|
|
|
by Sunday Lamdin |
|||
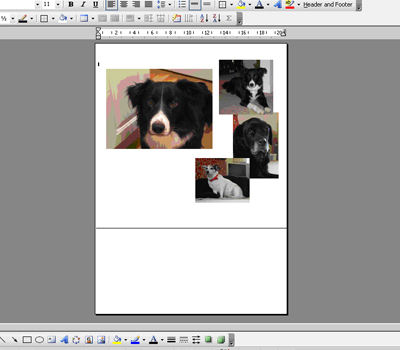
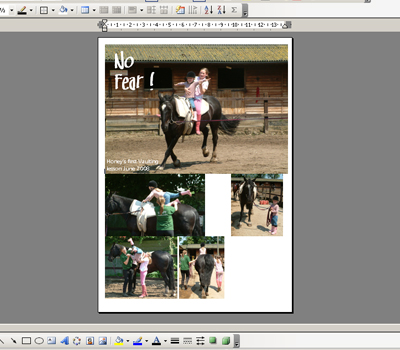
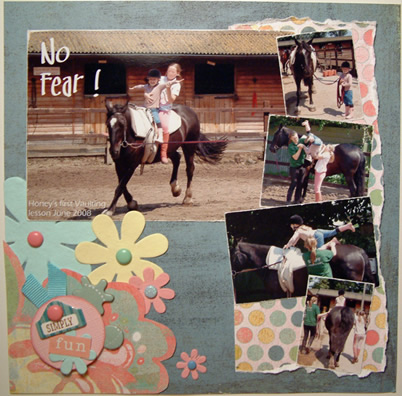
Doesn’t happen like that though does it?! I take loads of photos… I look through them and make the obvious deletions like blurred shots. But then I realise I have taken the equivalent of what we used to call a “whole reel” of film and actually I want to keep them all! You know… the ones where somebody is pulling a funny face, or a natural pose that is slightly out of shot. You end up with lots of similar photos, but just slightly different enough to want to keep them all. To get some idea of the size of the pictures I need for my 8x8 layout, I open up my word processing package – in my case ‘Word’ - and using the line draw tool, I draw a line across my page (which by default is A4 size) to show the 8x8 approximate length of the page (see above picture - also see the end of this article for the technical details as to how to do this accurately). I draw this line instead of changing the size of the paper to 8x8 – you’ll see why in a moment!. I place the pictures onto the page to see how big they are in comparison to the 8x8 size and reduce/crop them till I am happy. With a little more experience (and I can show you this Know How too in future articles) I can drag and drop my sized pictures onto a piece of A5 paper onscreen (half A4) and print them out on half a sheet of photo paper, this saves me having to sort other photographs out at the same time. Below is a screen shot of 5 photographs as printed from Word on an A5 sheet, and below that is the finished 8x8 scrapbooking layout using these 5 photos.
(This layout is also featured in a video showing how to put white text on a photograph before printing. It also shows breifly how to resize your pictures in Word too, although a future video will cover this in more detail). Click this link for more information. For an article specifically about resizing and printing photographs in Word see This Article.
|
|||
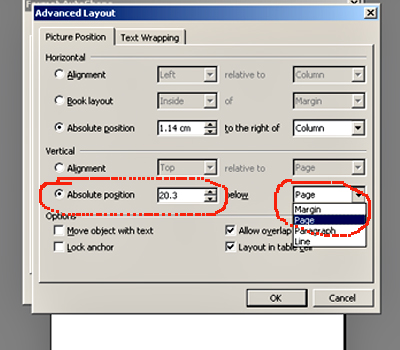
To place a line exactly in the right place on your Word document page follow these steps: 1. In your new blank page in Word, click View in the top menu, then Toolbars, then Drawing - this will bring up a Drawing toolbar somewhere on your page. 2. Click on the "line" icon (usually a picture of a diagonal line) 3. Now draw a line somewhere across your page (tip: don't draw it inside the box that says "create your drawing here" draw it outside that box if it appears) 4. Double click the line (or right click, then "format Auto shape" 5. A formatting box will appear. click the "layout" tab at the top of this format box. 6. Now click the button at the bottom which says "Advanced..." you should see something like the picture below.
7. Click the "Picture position" tab if it's not already open. 8. Change the "Absolute position" measurement to 20.3cm (or 8in) and the "Below" drop down list to Page - see two red circles on photo here. You don't need to change anything else. 9. Now click OK and then OK again. 10. You will now have a line that is exactly 8 inches down from the top of your piece of paper on screen. |
|||


