 I was having a conversation about this with my mum. She was struggling to use the program which came with her camera to view and print her photos. I was having a conversation about this with my mum. She was struggling to use the program which came with her camera to view and print her photos.
She had managed to print a couple, but they were large and printed right in the middle of an A4 sheet of photo paper (which isn’t particularly cheap) and of course it wasted all the white space around the edges.
Now… there are packages out there for fiddling with and printing photographs, but for a large percentage of home users… all they want to do is print the picture (or pictures) onto a piece of paper.
So here is my tip for successfully printing one or more photos onto a sheet of A4 paper, to get the most value for money out of your sheet.
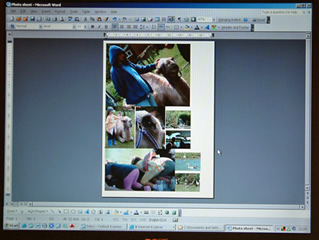
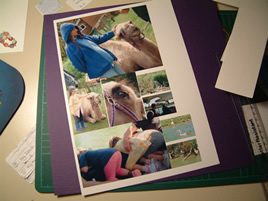
 The pictures (above and right) show the screenshot of my "jumbled" photos ready for printing and my printed page of photos ready for scrapbooking. There are two scrapbooking pages' worth of photos on this one A4 sheet. The pictures (above and right) show the screenshot of my "jumbled" photos ready for printing and my printed page of photos ready for scrapbooking. There are two scrapbooking pages' worth of photos on this one A4 sheet.
Use your Word Processor
 I use “Microsoft Word” and my Mum uses “Lotus”. But most word processing packages are very similar - This is what I do... I use “Microsoft Word” and my Mum uses “Lotus”. But most word processing packages are very similar - This is what I do...
In Word, I bring up a blank sheet of paper and reduce the margins just enough so that they are within the printer’s range. I take them down to about 4mm top, left and right and about 7mm at the bottom.
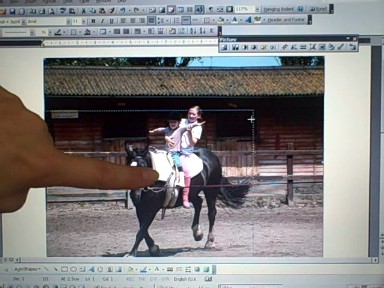
I then insert the first photograph I want into the “piece of paper” on the screen. It always brings the picture in full width (so it may initially take up the whole page) but all I do is click on a corner of the picture and drag it towards the middle to reduce it’s size, making sure I use a corner handle and not a handle in the middle of a side - as this will squash the picture out of it's original proportions - use a corner and it should keep it's proportions!
Now I can use the crop tool to trim it how I want it, and I can also adjust the contrast and brightness too. I also have the facility to change the image to black and white. And if I do make a mistake (it has been known you know!!) or change my mind... I press Ctrl + Z (or Edit-Undo) to go back a step or two!
 I use this method of printing for most of my photos. It is especially good for printing a load of photos for a mini album or something like an exploding box, where you have to keep within a certain size. I use this method of printing for most of my photos. It is especially good for printing a load of photos for a mini album or something like an exploding box, where you have to keep within a certain size.
I can manage about 12-15 pictures of approximately 5cm square (2”) on one A4 sheet and there is very little wasted paper!
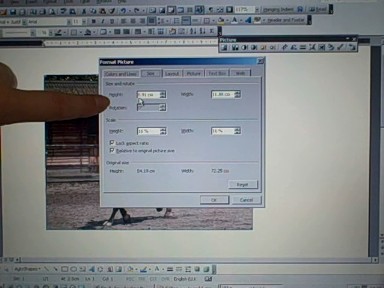
TIP: If you want to have an exact measurement for your photos, ie all the photos cannot exceed 5cm width because your mini album pages are only 5½ to 6cm wide anyway, you can go into “properties” (right click the picture and then click 'Properties') for each photo and specify the height or width and, hey presto, the other measurement is automatically calculated for you.
Then just click to the side of the picture to insert another picture and so on.
I will be making a video specifically about this soon, but in the meantime I have made a video about placing text on photographs... but it INCLUDES a little bit about resizing photographs in Word - click here or the video icon to view the video.

|


 I was having a conversation about this with my mum. She was struggling to use the program which came with her camera to view and print her photos.
 The pictures (above and right) show the screenshot of my "jumbled" photos ready for printing and my printed page of photos ready for scrapbooking. There are two scrapbooking pages' worth of photos on this one A4 sheet.
 I use “Microsoft Word” and my Mum uses “Lotus”. But most word processing packages are very similar - This is what I do...
 I use this method of printing for most of my photos. It is especially good for printing a load of photos for a mini album or something like an exploding box, where you have to keep within a certain size.