|
|
||
by Sunday Lamdin |
|||
Right then, hands up all those who have loads of time every day to fiddle about with their scrapbooking supplies (stash) endlessly and occasionally make the odd page layout? No… I didn’t think there would be many!
Well here is a simple way to help you manage your stash into useable kits so that you can make the most of your precious scrapping time.
A Common Mistake The common mistake people make when trying to make the most of their time is to try to achieve too much “in one sitting” as it were. A lot of you have to use the kitchen or dining room table and feel that by the time you have got all your stuff out and rifled through it, it’s time to put it all away again. So my advice to you is… Manage your time! For a start… don’t even attempt to scrap a page every time you sit down, you will be disappointed more often than not. Now don’t be disheartened, All I mean is.. a bit of preparation goes a long way. Ok, stop yawning! Prep can be boring I realise, but it really does help you. A bit of boring and a bit of nice is much better than a whole load of frustration! And besides just picking out things because they look nice together...ummm... isn't that one of the reasons we scrapbook? It's a fabulous chance to "stroke your stash" !!! (a scrapbookers term for admiring one's lovely things! LOL, and you can stop sniggering now!)
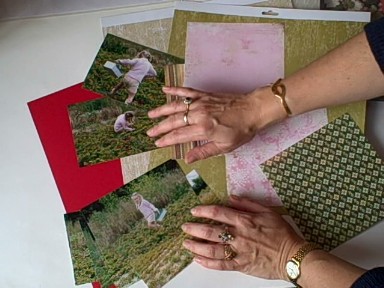
But the best way to achieve more finished pages is to prepare. We all know it’s the looking for matching papers and embellishments that can really take the time. So… make your own kit! - Watch the video for this article! I have placed “till next time” markers in this article where there is a natural break in proceedings and a great place to stop and “clear the table” until your next available opportunity for scrapbooking. ONE: If you have some photographs in mind that you want to scrap, and this is most often the way that scrappers want to create a page (or pages), collect them together and put them inside a page protector (it’s worth having your page protectors loose for this rather than already in an album). You can sort a couple of scrapbooking pages’ worth of photos at a time if you like, and place each set of photos into their own page protector, ready for the next stage. If you have any ideas, such as a title, or journaling ideas, make some notes, on scraps of paper if necessary, and pop those notes inside the page protector with the photos. TIP: I use bulldog clips on the page protectors to hang them from hooks or on my pin board. This is a good “till next time” point TWO: Now look through your cardstock and papers, take your photos for a moment and “offer them up” to the paper and card and see what looks good. Put those papers to one side, keep going through all your paper and card and pull out what you think works. When you have done this sit for a moment and just whittle out those that maybe don’t look quite so good, so that you now have a small selection of “potential” papers and card to match your photos. This is another good “till next time” point
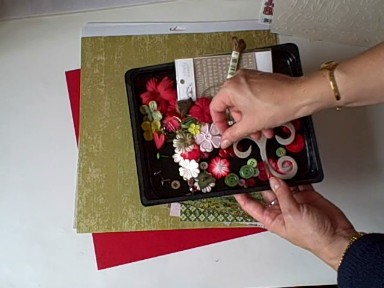
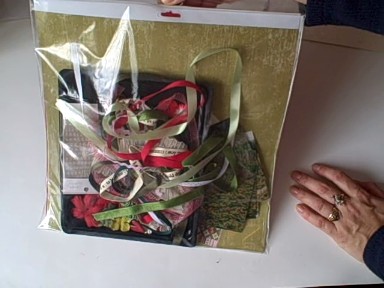
THREE: Now for the embellishments With your papers and photos spread in front of you, start going through your embellishments, your buttons, your brads, eyelets, flowers, odd bits and pieces. Pick items out by colour and/or theme and place one of each item only to one side. TIP: I use shallow dishes for this (the washed packaging from some pre-packed ham slices – and therefore free, yay, and super useful!) … but any white or black dish is suitable as the colour of the dish is then not competing with your embellishments and you can see them clearly. Place in your dish anything you think may look good with your photos and papers, just one of each at this stage. The idea is to place everything that you "could" use into your kit, and one of each item is enough to test whether it will work with your page layout. If you want more of the same, you can then retrieve more from the correct container. You will undoubtedly not use some of the pieces in your kit, so only putting one of each thing in means less tidying up... and I am all for that! These bits and pieces will all go into your page protector with the papers and photos. This is the next “till next time” point FOUR: Now go through any ribbons and fibres you may have, chipboard shapes and letters, quotes, etc. Don’t cut your ribbons, for now just put whole lengths of ribbon in your kit. Here is another “till next time” point
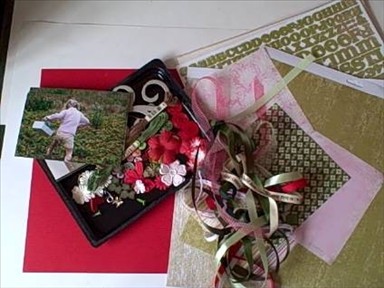
You now have what is effectively a page kit! In your page protector you should now have the photos, paper, card, embellishments and any notes, ready to start creating a page!
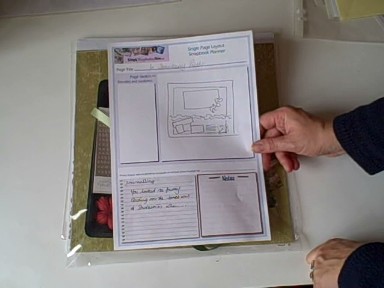
There is one final step I like to do to help me along with some inspiration. Sometimes I add someone else’s sketch, or maybe a picture of another layout that I wish to scraplift. Or it may be my own ideas jotted into my own sketch, or maybe a page from a magazine, such as an advert that has inspired me. This information goes into my plastic protector too with everything else.
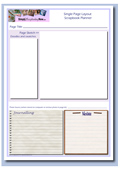
FREEBIE: I have created a Scrapbooking Page Planner (based on one by OrganizedScrapbooks.com) which you can download and/or print for free, on which you can make notes, write journaling ideas, draw a sketch or two, etc. I hope you find it useful. Click the picture of the links above to open the pdf, and then 'save as' to your PC from the open file.
Sometimes, I even place a vinyl stamp or two in my kits if I think it suits the layout too. Then I have a page kit which is ready for me to scrap! I have already done the “leg work” in sorting all the potential items to use. I can now pick up that whole collection when I have some time and get scrapping straight away. I will have in front of me the colour co-ordinated items from which I can choose, if I want 5 of a particular brad for instance, I can find the correct storage box and grab them quickly, the rummaging has already been done. When I have finished my page(s), I will just return the unused items to their storage. The beauty of this system is that you can take these home-made kits to a crop! (if you are making these kits specifically to do at a crop, you may like to put in a few of each item such as brads, so that you don’t have to wait till you get home to finish.) Variations of making your own kit, can include:Making page kits without a photograph as a starting point This is great if you have some lovely papers to use, but no matching photos. Just enjoy the stash! Challenge yourself using your own kit |
|||


 We all feel “up against it” time-wise and often have to snatch time here and there to create our pages. Quite often we spend time finding our supplies, wondering what to do next and then after a couple of hours when we have to go and do something else, we feel that we have achieved very little. Is that how you feel?