How to Organise your Stamps |
|
|
|
by Sunday Lamdin |
|||
If you are like me, you probably have a number of different types of stamps, by that I mean some mounted on wood, some acrylic stamps, I even have some magnetic rubber stamps!! Do you know how many stamps you have? Can you remember what all your stamps look like? Have they been tucked away somewhere and rarely see the light of day, so you have forgotten what you have? Well here are a couple of ways you can document your stamps horde so that you can quickly and easily check out whether you have what you need! Idea No.1 - Stamp your Stamps!
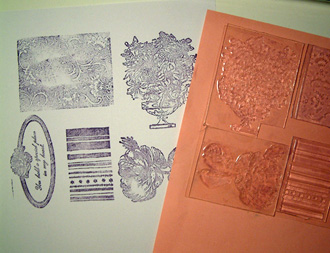
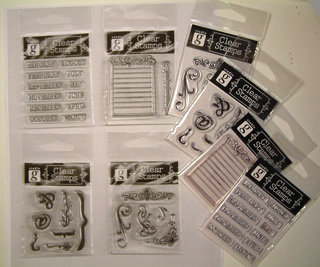
If you have your stamps in difference places, ie, "box 1.", "box 2.", etc, you can easily write a note on the sheets of stamped paper about the whereabouts of each of the stamps for ease of retrieval! The stamped images do not have to be perfect, they are literally to give you an idea of what the image is and how big it is! The photograph shows a some stamps (by Anna Griffin) still on their background acrylic storage sheet. All I did was roughly ink up all 5 stamps at the same time and then just make a rough print. If I wanted to I could have filled the whole of the sheet of A4 paper with others too. This is great for alphabets too... especially as you can see what the actual size is straight away and can "offer up" the printed sheets to a scrapbooking page-in-progress to check a stamp's suitability before the rummaging begins! Idea No.2 - Photocopy your stamps! A lot of us have 3-in-one printers nowadays (printers that also scan pictures and make photocopies), and this technique is really only for those with easy access to a photocopier. So I wouldn't recommend you trudge into your work office with a boxful of stamps to use the photocopier... someone might just notice! LOL The photo here shows the actual stamps in their packaging on the right of the picture and the photocopied image on the left. It may have been worth taking them out of the cellophane wrapping to avoid the reflection, but by photocopying the packaging I will know what sort of packet I am looking for when I start to rummage! "Ah there is method in her madness," she says!! Another point to remember about this way of doing things is that the stamps pictured have a printed acrylic sheet to which the stamps are stuck! The stamps themselves, being clear, don't photocopy that well! Used clear stamps with residue ink still on them can, however, provide a clear enough photocopied image. But this is a good technique for the solid rubber unmounted stamps too, such as "See D's" - you know the purpley coloured ones! As with stamping your stamps (always assuming you photocopy at 100%) you will have an image of the stamp at actual size, which is handy for sizing to your layout in progress. |
|||


 Make a stamped image of all your stamps onto pieces of A4 (or 8.5 x 11") and then you can place the paper into a folder (or just clip them together) and keep that handy so that you can see quickly and easily what you have. Once you decide on the stamp(s) you want... then you can play "hunt the stamp"! LOL.